
This includes HP E785xx, E730xx, E876xx, E731xx, E877xx and E826xx (xx can be digits or letters and indicate variations of the printer model due to engine speed or options).
Please verify your model on https://bardimm.com/s
Open the printer side panel to access its electronic board by opening the side screw then sliding the door laterally in the direction shown for arrow 2.
If you have problems sliding the door, gently insert a screwdriver on the top left then bottom left of that door as there are 2 plastic clips to free on the left side.
The electronic board appears once the side panel is removed.


There are two solutions to install the BarDIMM Pro USB stick in those devices:
1. Purchase the HP optional Internal USB expansion kit 4XN67A adding two-Internal USB-C Ports for Solutions and order the BarDIMM Pro part number JM30100Y (USB-C token form factor)
2. BarDIMM Pro part number JM30100Z can be installed inside the printer formatter after unplugging the USB cable that goes to the printer/MFP walkup USB plug (that anyway many Enterprise clients deactivate for security purpose).
Case 1: HP optional board adding two-Internal USB-C Ports for Solutions
That HP optional board replaces the HDD riser card connecting the HDD to the printer motherboard, adding 3 connector on top of the HDD connector including 2 USB-C connectors.
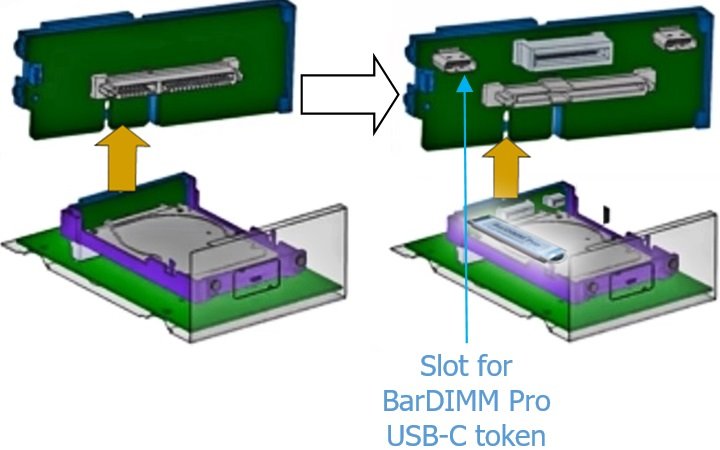
The BarDIMM Pro USB stick part # JM30100Y is a compact USB-C token.
• Plug the BarDIMM Pro USB-C token into any one of the two USB-C connectors.
• Close carefully the printer side panel, leaving the USB stick inside
• Connect the printer power and network cables respectively to the power plug and LAN socket
• Start the printer, it may reboot once during the installation process
Case 2: Use the USB A male plug that goes to the printer/MFP walkup USB plug
!  when plugging the USB stick that way, the printer/MFP front panel walkup USB port is deactivated and cannot be used.
If you want to keep the front panel USB female plug accessible to print documents from USB stick, you must use the case 1 listed above.
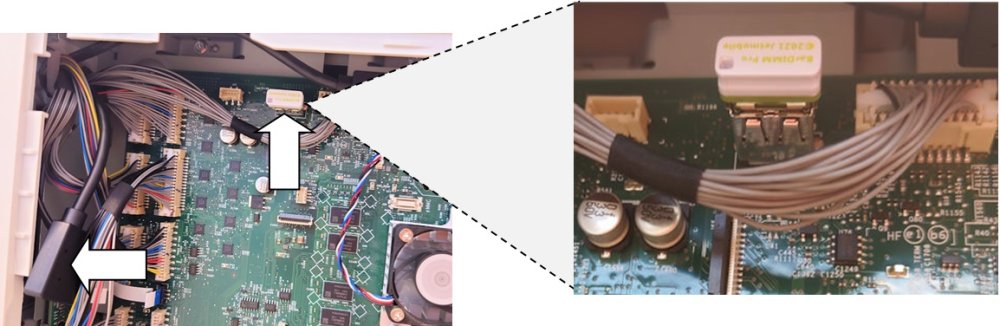
On the top left of the motherboard a USB A male connector connects into a USB-A female connector on the board.
That cable links the front panel walkup USB port to the motherboard.
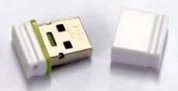
Open the BarDIMM Pro USB nano stick by removing its plastic cap, keep that plastic cap as you need it to protect another plug.
Unplug the USB-A male connector from the motherboard and attach the BarDIMM Pro plastic cap to that USB-A male connector to protect it. Move the connector to the left side behind cables and insert the BarDIMM Pro nano USB stick where the USB-A male connector was previously attached, as shown below.
Close carefully the printer side panel, leaving the USB stick inside, connect the printer power and network cables respectively to the power plug and LAN socket, start the printer, it may reboot once during the installation process.
Need more help with this?
BarDIMM support portal