
Attach the supplied dual sides adhesive tape to the BarDIMM side that does not show the information label.
Affix the BarDIMM Box on the back or side of the printer near the printer LAN cable female plug, so that nobody can easily interfere with it, and where it won’t be damaged by users or the printer.
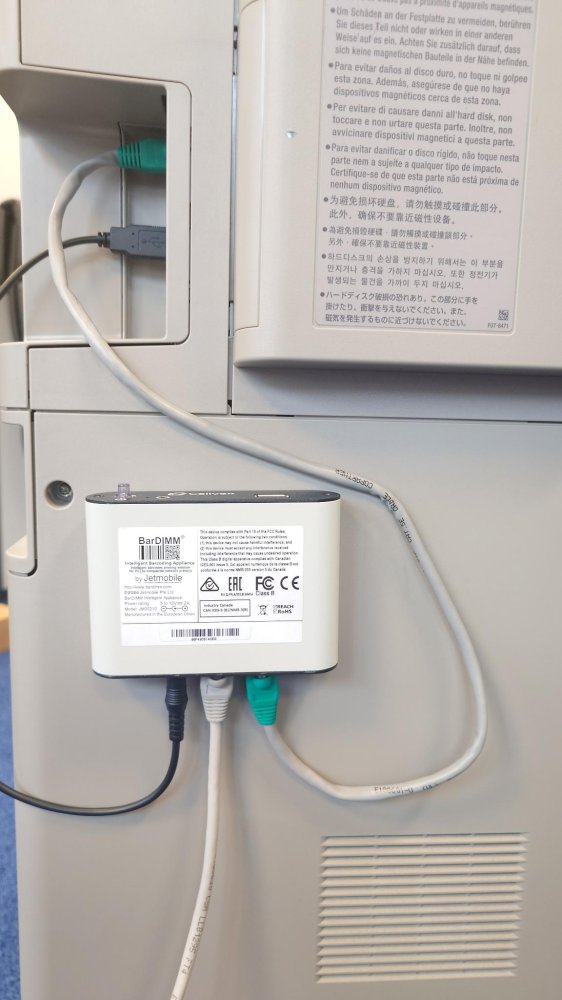
- Affix the BarDIMM Box in the back of the printer, on/off button up, RJ45 female connectors down, after cleaning the location to remove any dust and grease
- Remove the existing Ethernet cable from the printer and plug it to the RJ45 female plug on the BarDIMM Box with the “LAN” caption
- Connect the supplied short LAN cable to the printer female RJ45 plug and to the BarDIMM Box RJ45 connector with a printer icon.
- If your power the BarDIMM Box through the USB port connect the USB to jack cable to the USB connector on the back of the printer and to the power jack plug on the BarDIMM Box More information here.
- If your power the BarDIMM Box using the optional power supply, connect the Y cable C14 male connector to the cable powering the printer, the female C14 plus to the power supply and to the printer. Connect the jack connector of the power supply to the BarDIMM Box. More information here.
Here is a sample setup in the USB powered mode.
Need more help with this?
BarDIMM support portal